 Save
Save The sound of panko crunching under a knife still takes me back to my tiny Tokyo apartment kitchen, where I learned that the secret to restaurant quality chicken katsu isnt some mysterious technique, but patience with the breading process. My Japanese neighbor Mrs. Sato would lean over her balcony and yell compliments whenever she smelled the frying oil, eventually coming down to teach me her grandmother is trick of pressing the breadcrumbs on twice. Now whenever I make this, I remember her laugh and the way she insisted katsu tastes best eaten standing up, straight from the cooling rack.
Last summer my roommate walked in mid-frying and literally stopped in her tracks, asking what smelled so incredible. We ended up eating the cutlets standing around the stove, dipping pieces directly into the sauce and burning our fingers because we could not wait for them to cool properly. Since then, is become our Friday night tradition, the one meal we never take photos of because we are too busy enjoying every bite.
Ingredients
- 4 boneless skinless chicken breasts: Pounding them to even thickness is crucial, it ensures uniform cooking and creates that perfect tender texture that Japanese cutlets are famous for
- Salt and black pepper: Keep it simple, this is all the seasoning the chicken needs before breading, letting the panko and sauce do the heavy lifting
- All-purpose flour: The first layer of defense that helps the egg wash stick, creating the essential foundation for that ultimate crunch
- 2 large eggs mixed with 1 tablespoon water: The water thins the egg just enough for an even coating, a restaurant trick I learned from watching line cooks work
- Panko breadcrumbs: These airy Japanese breadcrumbs are non-negotiable, regular breadcrumbs will give you a heavy coating instead of that light shattering crunch
- Vegetable oil: You need enough for shallow frying, about half an inch up the side of your pan, maintaining 170°C for perfectly golden results
- Ketchup and Worcestershire sauce: The base of your tonkatsu sauce, creating that familiar sweet-tangy flavor profile everyone recognizes
- Soy sauce and mirin: These add the necessary umami depth and subtle sweetness that makes the sauce taste authentic
- Dijon mustard and sugar: The secret ingredients that balance and brighten the sauce, cutting through the richness of the fried chicken
Tired of Takeout? 🥡
Get 10 meals you can make faster than delivery arrives. Seriously.
One email. No spam. Unsubscribe anytime.
Instructions
- Pound the chicken to perfection:
- Place each breast between plastic wrap and use a meat mallet or heavy pan to pound to 1/2 inch thickness, working from the center outward and being gentle near the edges to prevent tearing. Season both sides generously with salt and pepper, letting them sit while you set up your breading station.
- Set up your breading assembly line:
- Arrange three shallow dishes in order: flour in the first, beaten eggs whisked with water in the second, and panko in the third. Having everything organized beforehand prevents the chaos of floury hands reaching for cabinet handles, a mistake I have made exactly once.
- Coat the cutlets systematically:
- Dredge each chicken piece in flour, shaking off the excess, then dip it in the egg mixture letting the runoff drip off. Finally press firmly into the panko, turning and pressing again to ensure an even, thorough coating that will not fall off during frying.
- Get your oil ready:
- Heat about 1 cup of oil in a large skillet over medium heat until it shimmers and reaches 170°C (340°F). If you do not have a thermometer, drop a single panko crumb in the oil and when it sizzles immediately and turns golden in about 3 seconds, you are ready to fry.
- Fry to golden perfection:
- Carefully place the breaded cutlets in the hot oil, working in batches so you do not crowd the pan. Fry for 3 to 4 minutes per side until deep golden brown and the chicken reaches 74°C (165°F) internally, then transfer to a wire rack to drain rather than paper towels which can make the bottom soggy.
- Whisk together the magic sauce:
- In a small bowl, combine ketchup, Worcestershire sauce, soy sauce, mirin, Dijon mustard, and sugar. Whisk until the sugar dissolves completely and the mixture is smooth, tasting and adjusting the balance to your preference, sometimes I add a drop more soy sauce for depth.
- Slice and serve immediately:
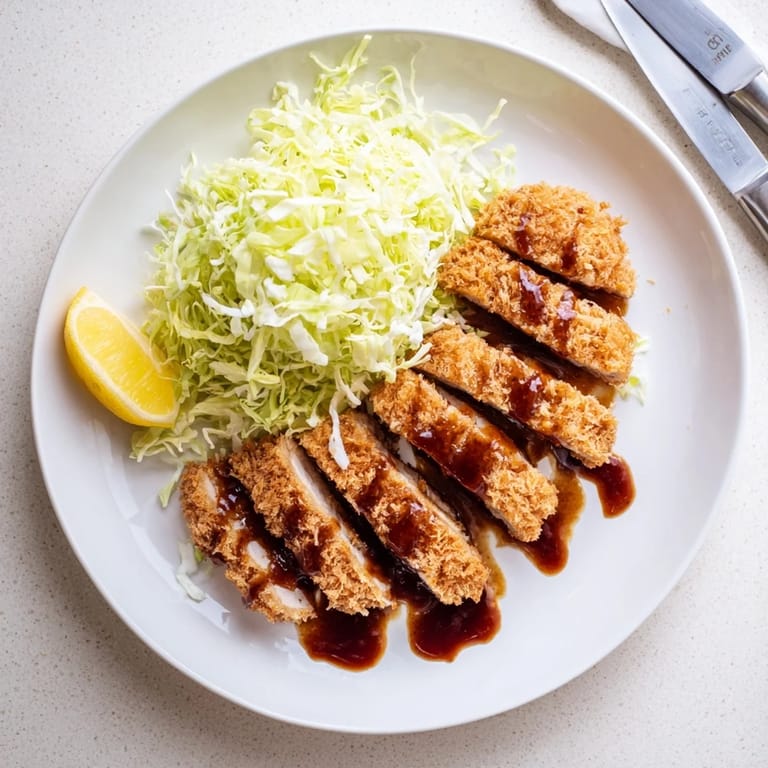
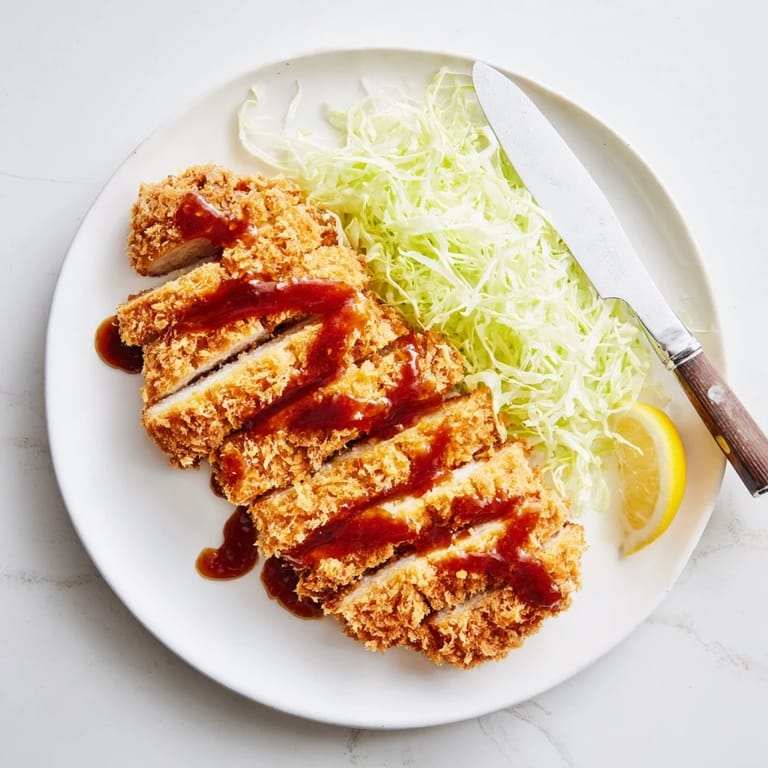
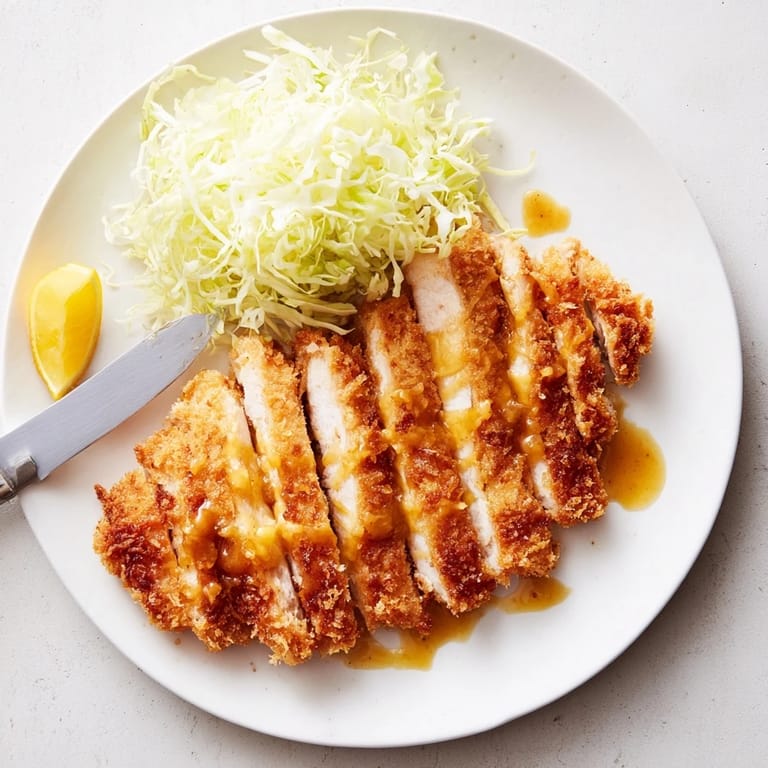
- Cut the chicken katsu into strips for easier eating and serving, arrange on plates with shredded cabbage, steamed rice, and lemon wedges. Drizzle with the tonkatsu sauce or serve it on the side for dipping, either way works perfectly.
 Save
Save This recipe became my dinner party staple after my friend Hiroko took one bite and actually got quiet, which for her is saying something. She told me it reminded her of Sunday lunches at her grandmother is house in Osaka, which might be the best compliment I have ever received. Now whenever I make it for friends, there is always that moment of silence at the table when everyone first bites in, followed by immediate requests for the sauce recipe.
Getting The Perfect Crisp
The difference between good chicken katsu and great chicken katsu comes down to how you apply the panko. Do not just sprinkle it on, press firmly and turn the cutlet multiple times, pressing again each time. I learned this from watching a chef at a small Tokyo restaurant work through lunch service, his movements precise and practiced. Double coating with panko creates that extra thick layer of crunch that makes this dish unforgettable.
The Sauce Balance
Your tonkatsu sauce needs to strike that perfect balance between sweet, tangy, and savory. The ketchup provides the familiar base, but the Worcestershire sauce adds that essential depth while the mirin rounds everything out. I have started making double batches and keeping it in a jar in the fridge, it lasts for weeks and somehow tastes even better after the flavors have had time to meld together. Adjust the sugar based on your sweetness preference, but do not skip it entirely.
Serving It Right
Traditional presentation matters more than you might think. Shredded cabbage is not just garnish, its cool crunch provides the perfect contrast to the hot, rich chicken. Steam your rice properly and fluff it with a rice paddle for the best texture. A simple lemon wedge squeezed over everything right before eating cuts through the richness and brightens each bite, tying the whole plate together.
- Use a sharp knife to slice the katsu, a dull knife will drag the breading off and ruin that beautiful crust
- Cabbage should be shredded very thin, almost translucent, and kept ice cold until serving
- Let the chicken rest for just 2 minutes after frying before slicing, this locks in the juices
 Save
Save There is something deeply satisfying about hearing that first crunch through the panko, knowing you have created something that rivals the best Japanese restaurants. This recipe has become more than just dinner to me, it is a connection to memories and moments I will never forget.
Recipe Q&A
- → What makes panko breadcrumbs different from regular breadcrumbs?
Panko are Japanese-style breadcrumbs made from crustless white bread processed into large, airy flakes. They create a lighter, crunchier coating that stays crispy longer than standard breadcrumbs, giving chicken katsu its signature delicate crunch.
- → Can I bake chicken katsu instead of frying?
Yes, spray the breaded cutlets generously with oil and bake at 425°F (220°C) for 20-25 minutes, flipping halfway. The texture won't be quite as crispy as shallow-frying, but still delicious and lighter.
- → What's the difference between chicken katsu and tonkatsu?
Katsu refers to the cooking method—breaded and fried cutlets. Chicken katsu uses chicken, while traditional tonkatsu uses pork. Both use the same panko coating and are served with tonkatsu sauce.
- → How do I prevent the breading from falling off?
Press the panko firmly onto the chicken to help it adhere. Let the breaded cutlets rest for 10 minutes before frying—this dries the coating slightly and creates a stronger bond. Avoid overcrowding the pan, which can cause steam.
- → Can I make this gluten-free?
Use gluten-free all-purpose flour for dredging, cornstarch or arrowroot starch instead of flour, and certified gluten-free panko. Substitute tamari for soy sauce in the tonkatsu sauce and use a gluten-free Worcestershire.
- → How long does chicken katsu keep in the refrigerator?
Store leftover cutlets in an airtight container for up to 3 days. Reheat in a 350°F oven for 10-12 minutes to restore crispiness—the microwave will make them soggy. The sauce keeps refrigerated for 2 weeks.