 Save
Save I discovered hojicha pastry cream quite by accident on a gray afternoon when my usual Earl Grey ran out and I grabbed a box of roasted tea instead. What started as a practical substitution turned into something revelatory—the toasted, almost caramel-like notes transformed a classic crème pâtissière into something with real depth and character. Now whenever I need to fill cream puffs or layer a delicate dessert, this is what I reach for.
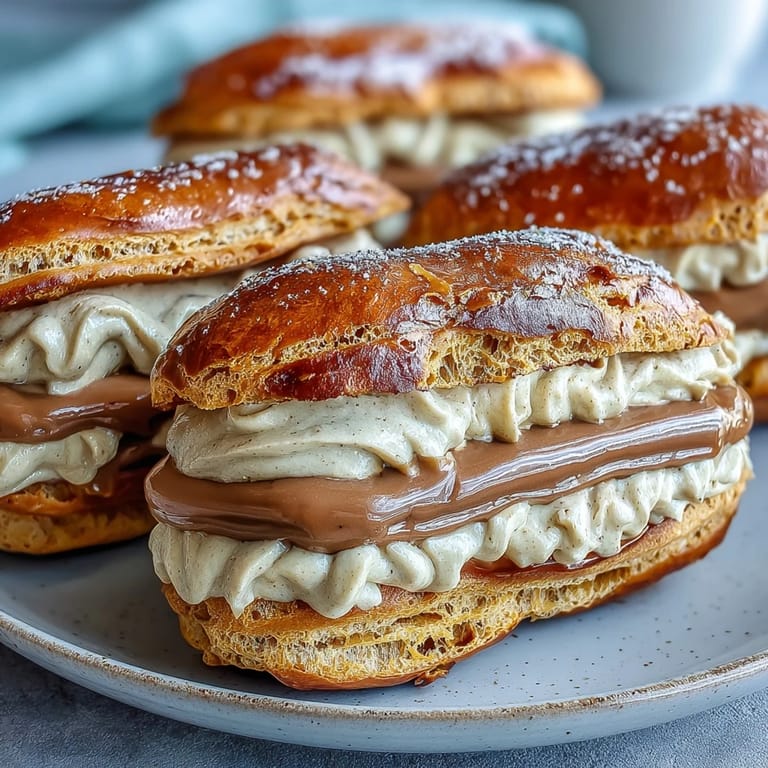
I made this for a friend's engagement party last spring, piping it into homemade choux pastry shells while the kitchen filled with the smell of toasted tea. She took one bite and actually closed her eyes, and that's when I knew I'd created something worth keeping in my regular rotation. The pastry cream was so smooth and the hojicha flavor so distinctly present—it felt like I'd finally nailed what I was going for.
Ingredients
- Whole milk (2 cups): Use the freshest milk you have because it's the base for everything; cold milk straight from the fridge actually helps prevent lumps later.
- Hojicha loose leaf tea or tea bags (3 tablespoons): The roasted tea is non-negotiable here—it's what gives this cream its signature warm, toasted character that regular green tea can't match.
- Unsalted butter (3 tablespoons): Adds richness and silkiness; salted butter will throw off the balance you're building.
- Large egg yolks (4): These are your thickener and emulsifier, so use room temperature eggs if possible for smoother whisking.
- Granulated sugar (1/2 cup): Don't reduce this—the sugar stabilizes the eggs and creates that luxurious mouthfeel.
- Cornstarch (3 tablespoons): This prevents the cream from breaking and gives it that silky, stable texture that holds up to piping.
- Vanilla extract (1/2 teaspoon): A whisper of vanilla bridges the gap between the hojicha and everything else you'll pair it with.
- Salt (pinch): Amplifies the tea flavor without announcing itself.
Tired of Takeout? 🥡
Get 10 meals you can make faster than delivery arrives. Seriously.
One email. No spam. Unsubscribe anytime.
Instructions
- Heat the milk gently:
- Pour your milk into a medium saucepan and watch it carefully over medium heat until wisps of steam rise from the surface and tiny bubbles form around the edges. You want it hot enough to properly steep the tea, but boiling will make the cream taste slightly scorched.
- Steep the hojicha:
- Add your tea leaves or bags to the hot milk, then remove from heat and cover the pan with a lid or even a plate. Let it sit for exactly 10 minutes—this is where all that roasted, toasted flavor transfers into your milk. If you peek too early, don't worry, but resist the urge to leave it longer than 10 minutes or the tea becomes bitter.
- Strain with intention:
- Pour the milk through a fine mesh sieve into a bowl, using the back of a spoon to gently press the wet tea leaves so every drop of flavor comes through. The pressing motion is important; that's where the last bit of richness hides.
- Temper your yolks:
- In a separate bowl, whisk together the egg yolks, sugar, cornstarch, and salt until the mixture is pale yellow and smooth—this takes about a minute of steady whisking. This mixing step matters because it prevents lumps when you add the hot milk.
- Combine milk and eggs carefully:
- Slowly pour the warm hojicha milk into the yolk mixture while whisking constantly, as if you're coaxing them together rather than shocking them. This gradual tempering is what keeps your eggs from scrambling and gives you a silky result.
- Cook until it thickens:
- Return everything to the saucepan and whisk constantly over medium heat. Watch as the cream gradually goes from pourable to thick and glossy, usually around 2 to 3 minutes—you'll feel the whisk moving slower as the cornstarch does its job. When you see bubbles breaking on the surface, you're done.
- Finish with butter and vanilla:
- Remove from heat and whisk in the butter and vanilla extract until they're completely incorporated and the cream looks silky again. The butter adds a subtle richness that softens the tea flavor just enough.
- Protect the surface:
- Transfer your cream to a clean bowl and press plastic wrap directly onto the surface, touching the cream itself. This prevents that annoying skin from forming, which happens because the cream's surface loses moisture as it cools.
- Chill completely:
- Refrigerate for at least 1 hour, though 2 hours is even better if you have the time. The cream will set up and develop an almost custard-like texture that's perfect for piping.
- Smooth before using:
- Give the chilled cream a brief whisk just before piping or spooning it into your pastries. This brings it back to a spreadable consistency without overworking it.
 Save
Save What gets me every time is that moment when you taste the cream and that subtle hojicha flavor unfolds on your tongue—it's sophisticated and warm without being overwrought. It's the kind of detail that turns a simple cream puff into something memorable, a small act of care that says someone actually thought about every layer.
The Hojicha Factor
Hojicha is roasted Japanese green tea, and that roasting process creates a completely different flavor profile than you'd get from regular matcha or sencha. It's got this caramel-like, almost coffee-like depth without any bitterness, which is why it plays so beautifully with the sweetness of pastry cream. The first time I used it, I was surprised by how it didn't announce itself loudly but instead created this warm backdrop that made everything around it taste better.
Building Flavor Layers
This cream is honest work—there's no hiding behind vanilla or chocolate or anything else. The hojicha is the star, supported by butter, sugar, and just enough vanilla to tie things together, so every ingredient needs to be at its best. I've learned to taste my milk before heating it, to check my tea for freshness, and to make sure my butter is truly unsalted because salted butter will throw off this delicate balance.
Using Your Pastry Cream
Beyond cream puffs and éclairs, this cream is incredibly versatile in your hands once you understand how it works. Layer it between sponge cake, pipe it into tart shells, or even swirl it into your morning yogurt if you're feeling bold. The texture is thick enough to hold its shape but silky enough that it never feels heavy or stodgy.
- For an even lighter filling, fold whipped cream into the chilled pastry cream just before using it, which gives you an airy mousse-like texture perfect for delicate pastries.
- If you want to experiment, hojicha powder can replace the loose leaf tea—just use 2 teaspoons and whisk it directly into the milk, which saves you the straining step.
- Don't be afraid to pair this with complementary flavors like matcha choux, black sesame, or even subtle citrus in your pastry shells.
 Save
Save This hojicha pastry cream feels like having a secret ingredient that elevates everything it touches, and once you've mastered the technique, you'll find yourself making it constantly. It's the kind of recipe that reminds you why cooking is worth the care and attention.
Recipe Q&A
- → What makes hojicha tea unique in this custard?
Hojicha offers a roasted, nutty aroma with subtle smokiness that complements the creamy custard base, creating a distinct flavor profile.
- → How is the hojicha flavor extracted?
The tea is steeped in heated milk, then strained to infuse the custard with its warm, toasted notes without bitterness.
- → Can this custard be used for other desserts besides pastries?
Yes, its smooth texture and mellow flavor make it excellent for layering in cakes or as a stand-alone dessert component.
- → What is the best method to avoid lumps in the custard?
Gradually temper the egg yolk mixture by slowly adding warm milk while whisking constantly, then cook until just thickened.
- → How should the custard be stored after preparation?
Cover directly with plastic wrap and chill in the refrigerator for at least one hour to set and prevent skin formation.