 Save
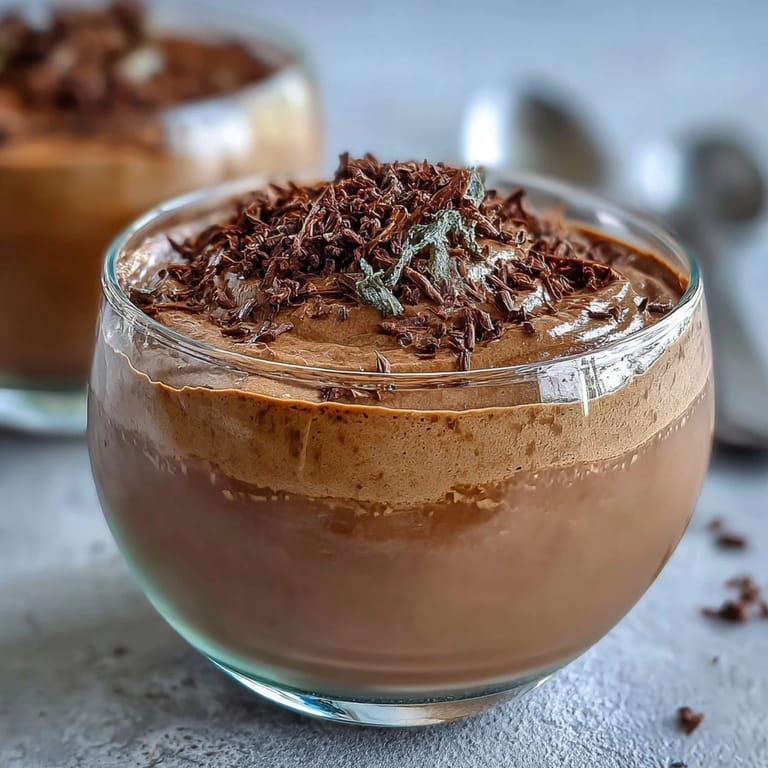
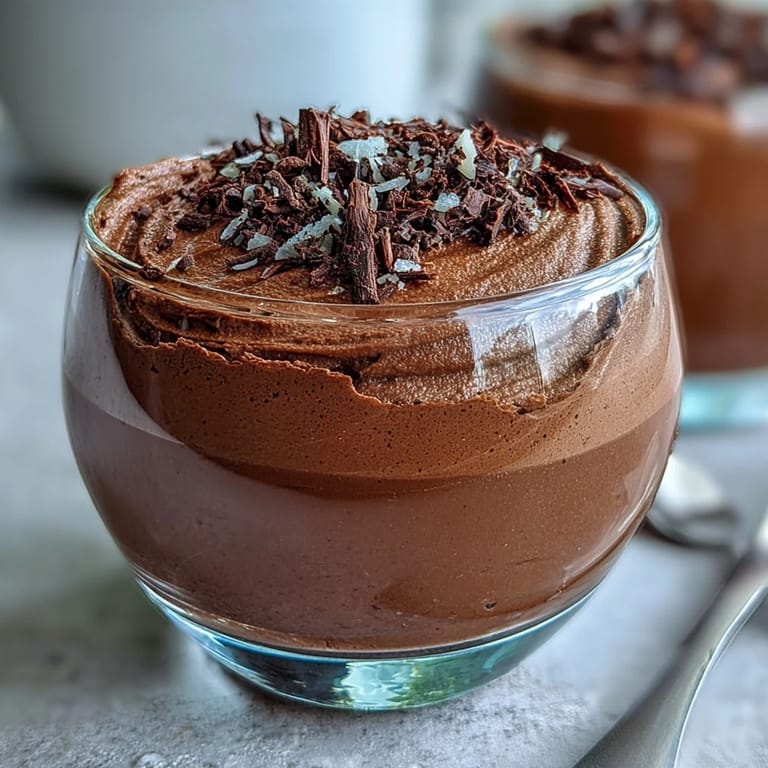
Save The first time I tasted hojicha mousse, I was sitting in a tiny tea house in Kyoto during autumn, watching the barista whisk something that looked like clouds into a glass. What struck me wasn't just how light it was on my tongue—it was the way the roasted tea flavor lingered, warm and almost nutty, without any of that heavy richness I'd expected. I spent the next year trying to recreate that moment in my own kitchen, and this recipe finally captured it perfectly.
I made this for my sister's dinner party on a rainy Saturday, and something magical happened when everyone tasted it simultaneously—that collective pause, then the quiet exclamation of surprise. She said it tasted like autumn in a spoon, which somehow felt exactly right. It became the dessert I reach for whenever I want to impress without stress.
Ingredients
- Hojicha tea leaves (2 tablespoons): The star of this dessert—roasted green tea with a toasty, almost caramel-like depth that makes people guess the flavor before they identify it as tea.
- Whole milk (200 ml): Use full-fat milk for the richest mousse; the fat carries the hojicha flavor beautifully and creates a silkier mouthfeel.
- Large eggs, separated (3): Room temperature eggs whip better and create more volume in the whites, which is crucial for that cloud-like texture.
- Granulated sugar (60 g): Divided between the yolk mixture and the whites; this balance ensures sweetness without overwhelming the tea's subtle bitterness.
- Vanilla extract (1 teaspoon): A small amount just whispers into the background, adding complexity without announcing itself.
- Cornstarch (1 tablespoon): This stabilizes the mousse base so it doesn't break when you fold in the egg whites.
- Powdered gelatin (2 teaspoons): Blooming the gelatin first prevents lumps and ensures it dissolves smoothly into the warm mixture.
- Cold water (2 tablespoons): Used only for blooming; this keeps the gelatin from clumping when you add it to hot liquid.
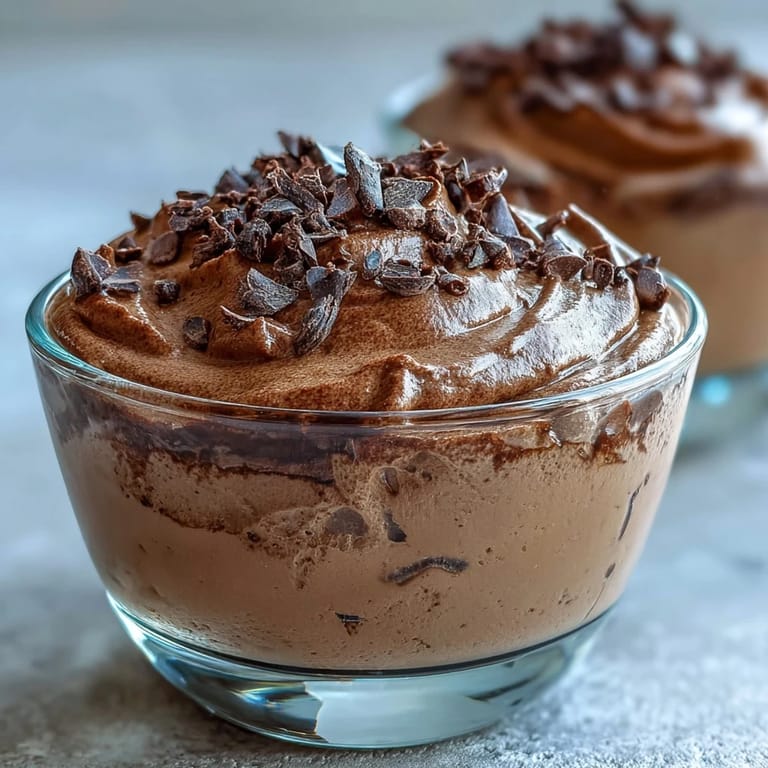
- Toasted hojicha tea leaves or cocoa nibs (for garnish): A sprinkle on top adds visual contrast and one last touch of hojicha flavor in each bite.
Tired of Takeout? 🥡
Get 10 meals you can make faster than delivery arrives. Seriously.
One email. No spam. Unsubscribe anytime.
Instructions
- Steep the hojicha in warm milk:
- Heat the milk until you see small bubbles forming around the edges—not boiling, just steaming. Add the hojicha leaves, cover the pan, and let it sit for 10 minutes; you'll watch the milk turn a pale golden-brown as the tea releases all its roasted, nutty essence. Strain carefully, pressing gently on the leaves to extract every bit of flavor.
- Bloom the gelatin:
- Sprinkle the powdered gelatin over cold water in a small bowl and let it sit for 5 minutes without stirring. It will look granular and slightly swollen—this is exactly what you want before you add it to the hot mousse base.
- Create the yolk base:
- Whisk the egg yolks with 30 grams of sugar and cornstarch until the mixture is pale and ribbons of yolk slowly dissolve back into itself when you lift the whisk. Slowly pour in the warm hojicha milk while whisking constantly to prevent the yolks from cooking into scrambled eggs.
- Thicken over gentle heat:
- Set your bowl over simmering water—the bottom should not touch the water—and whisk constantly for 3 to 5 minutes until the mixture thickens enough to coat the back of a spoon. When you run your finger across the coated spoon, it should leave a clear trail.
- Add the gelatin and cool:
- Remove from heat and stir the bloomed gelatin into the hot mixture until it disappears completely, then add the vanilla extract. Let this cool to room temperature, stirring every minute or so to release heat evenly and prevent a skin from forming on top.
- Whip the egg whites:
- In a completely clean, dry bowl, beat the egg whites until soft peaks form—when you lift the beaters, the peaks should curl over slightly. Gradually add the remaining 30 grams of sugar and continue beating until stiff, glossy peaks form that stand straight up.
- Fold gently:
- This is the moment that matters most: add the egg whites to the cooled hojicha mixture in thirds, folding gently with a rubber spatula using a bottom-to-top motion. Don't overmix; you want visible streaks of white to disappear just as the mixture becomes uniform.
- Chill and set:
- Spoon the mousse into serving glasses or ramekins and refrigerate for at least 2 hours. The gelatin will slowly firm everything up from the bottom, creating that signature mousse structure.
- Finish and serve:
- Just before serving, top each glass with a pinch of toasted hojicha leaves or cocoa nibs for a final whisper of flavor and a touch of elegance.
 Save
Save What surprised me most about this dessert is how it became a conversation starter—people always ask what gives it that sophisticated, unfamiliar flavor, and there's something wonderful about explaining hojicha to someone trying it for the first time. It's become the dessert I make when I want something that feels special but doesn't require me to spend hours in the kitchen.
Why Hojicha Matters
Hojicha is green tea that's been roasted at a high temperature, which transforms it into something almost entirely different—warmer, deeper, less vegetal. Most people don't realize it's actually lower in caffeine than regular green tea because the roasting reduces the caffeine content, which means you can serve this after dinner without keeping anyone awake. The flavor is approachable and comforting in a way that feels both exotic and familiar at the same time.
Making It Your Own
I've experimented with dairy-free versions using oat milk and almond milk, and both work beautifully—the mousse stays light and airy either way. You can also adjust the sweetness by adding an extra tablespoon of sugar if your hojicha tastes particularly bitter, or reduce it slightly if you prefer the tea flavor to dominate. Fresh berries on the side brighten up the richness and add a lovely contrast in color and flavor.
Serving and Pairing Ideas
The elegance of this mousse means it deserves thoughtful accompaniments—I've found that a light, floral sake or even a second cup of hot green tea pairs beautifully, creating a moment that feels almost ceremonial. Serve it in beautiful glasses or ramekins because the pale golden color is part of the presentation, and the contrast between the spoon's coolness and the mousse's silky texture makes every bite feel intentional.
- Pair with fresh raspberries or sliced peaches for brightness and tartness that cuts through the richness.
- A drizzle of honey or a small dollop of whipped coconut cream adds richness without heaviness.
- Serve chilled but not ice-cold—this lets the hojicha flavor shine through fully.
 Save
Save This mousse reminds me that the most impressive desserts are often the simplest, the ones that trust their ingredients to speak for themselves. Make it for someone you want to impress, or make it for yourself on a quiet evening and taste how something this light can feel so complete.
Recipe Q&A
- → How is the hojicha flavor infused into the mousse?
Hojicha tea leaves are steeped in warm milk to extract the roasted tea essence, which becomes the flavor base for the mousse.
- → Can the mousse be made dairy-free?
Yes. Substitute whole milk with plant-based alternatives like oat or almond milk for a dairy-free version.
- → What helps the mousse achieve its airy texture?
Whipping egg whites to glossy stiff peaks and gently folding them into the custard base creates a light, airy structure.
- → Why is gelatin used in this preparation?
Gelatin stabilizes the mousse, helping it set and maintain its delicate shape after chilling.
- → What garnishes complement the hojicha mousse?
Toasted hojicha tea leaves or cocoa nibs add texture and deepen the roasted flavor profile.
- → How long should the mousse be chilled before serving?
Chilling for at least 2 hours ensures the mousse fully sets and develops its refined texture.